Tuesday, December 29, 2009

Word!

At the beginning of the year, I was inspired by a few friends to pick a word of the year. That word - would be something that I would strive to work for all year long. The word that I picked at the beginning of 2009 was "Serenity."

I can honestly say, that unlike New-Years' resolutions and promises to myself, my "word of the year" was something that I was thoughtful about all year long. My word "Serenity" was something that I worked very hard to achieve and found great comfort in when I was able to have success. "Serenity" brought me comfort on long trips to visit ailing grandparents and when I had other times of stress at work and at home. I found creative ways to bring calm quietness into my life this year. I dabbled in progressive relaxation and meditation. I used my crafting time as a way to unwind and destress. I looked for new music and things like yoga and stretching to bring myself moments of peace and calm. In my sometimes hectic life as a mom, nurse, caregiver and wanna-be artist, I needed those moments, and they honestly helped me when times were at their worst this year. Thank you, friends, for inspiring me to chose a word! I had such a positive experience from this, that I have chosen to do it again for 2010. Picking my new word has been challenging. I have given it several weeks' thought. I didn't want to pick a word that would be too simple. I thought about the word "inspiration" - but I don't really have much trouble being inspired. I thought about words like "relaxation" but that was to similar to "Serenity" and somehow, the word "Margaritas!" just doesn't seem appropriate either. :)

After much thought - I have chosen my word for 2010 and my word is "Organization."


I have chosen "Organization" because it is something that I would like to practice in all aspects of my life. Trying to be more organized at home, at work, in my car, in all areas - can only benefit me and my family (and friends and co-workers) too.
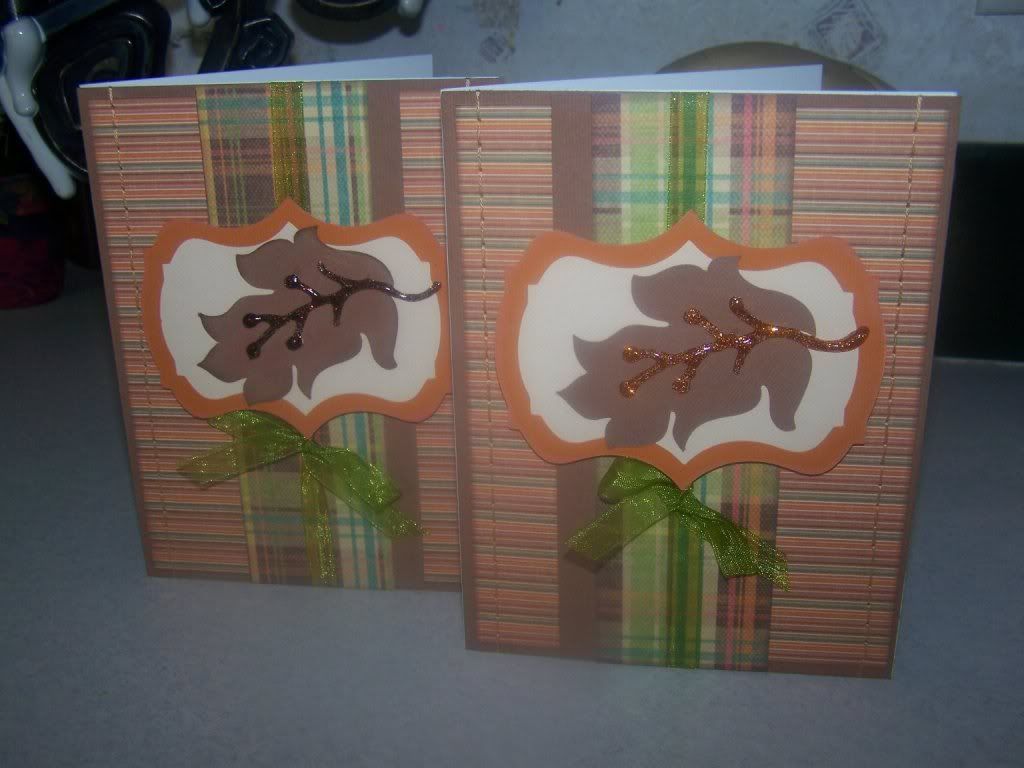
And so with that in mind, I set off to have a Happy, safe, fun, and Organized New Year! I have a lot to do and will try to share some of my ideas too - I have a few fun ones in mind for scrapbooking / cardmaking things.

Will you be picking a word for 2010? I would love to hear about your word. There are no rules. . . it can be a verb, a noun, a feeling, a goal - anything that you want to think about all year long. One word is a lot easier to remember than a bunch of resolutions anyway, don't you think? :)

Happy and safe New Year to all - and see you soon!
-Nancy

Wednesday, December 16, 2009

December Expressions - Video

Yaay. . . here's a little video with more about maximizing that awesome paper in the December ETM kit. . . What is your favorite part about the kit? I am still in love with that big fat green ric-rac. :)


Saturday, December 12, 2009

December Expressions!

I'm working nights this weekend - with a fresh layer of snow on the ground and sub-zero temperatures, it's always a fun time in Orthopedics! Add to the masses, all of the people who suddenly have to have their surgery done NOOOWWW NOW NOW NOW NOWNOWNONONOW because their deductable is met for the year, and things get pretty hairy!!! Oi!

The Expressions kits from ETM are out and wow are they fabulous this year! The paper is so cute and textured - I love anything that is textured. The paper in this months' kit feels like WALL PAPER! Srsly. . . you just gotta feel it. Pet it. It's good huh? Daisy Bucket papers are new to me. But I will definitely be watching for them in the future!

Kim had the awesome idea of focusing this month on MAXIMIZING your paper, and boy do I have some fun ideas for this. Check them out. . . Here are the cards that I made with this months' kit. I have also vowed to try to do a video tutorial each month to go with the cards. . .and I'm gonna do it. . . as soon as I am on my days off again. So check it out. . . here are the cards for now and I will be seeing you all soon on the YouTubes. :)

This first card was done following one of the card maps from Page Maps. . . I do love to follow those cute little designs! Note here how I maximized my use of paper by adding a coordinating paper to make an envelope liner. . . I also used a strip of the patterned paper instead of ribbons, and used a hole punch to make dots instead of using brads or eyelets. You can always use these tricks in a pinch! And since they are from the paper provided, they are a perfect match!

Kim threw in the cutest, fattest piece of green ric-rac I have ever seen to this months' kit! I stitched it down to the paper and made a coordinating tag out of one of the rub-ons. I do love the letter stickers that we got this month. You can make your cards say whatever you want!

Ahh, maximizing the paper. . .I used a strip of the red paper to make a ribbon and bow for this present card. You can do this easily any time you need a ribbon but don't have one to match. Just loop pieces of the paper and fasten them with tape, or a brad, as shown. I added a tag, and made a matching address label for the envelope. Cute, cute, cute! I love these patterns!!!

This is one of my favorite cards from the kit - I used the chocolate brown patterns with the red. I was all sorts of proud of my "Chocolate Covered Cherry Card" Until my son came along and noted that it looks like a Hostess Cupcake. Well, I'll be darned, it does! Somebody is going to get a box of cupcakes this year, with this card. I bet my son wishes it was him. :) I used some of the left over brown paper to line the envelope, and covered ALL surfaces of this card - both sides of the fold - out flaps, and even the back of the card with the brown, Hostess Cupcake Paper. Fun!

Here is that cute fat ric-rac again - I stitched it to the card with a strip of the candy stripe ribbon too. That was Kim's idea. . . she is so wise. :) I also love these big circle patterns - they are great for making big tags - ornaments - and I think that I will even stamp some and use them as gift tags for Christmas Presents! Did I mention that this months' kit includes an acrylic "To: and From:" stamp that is going to be so very useful all year long? It's the best thing since. . . Christmas.

I think that one of the things that I love best about this months' kit is the diversity of colors that Kim has picked with the papers. Reds, greens, blues, browns, and even these cute pink and turquoise colors - Here I go using strips of the patterned paper again in place of ribbon. This card just makes me happy! Pink and blue for Christmas! Who knew? I love it!

Stay tuned for this months' tutorial on how to make THIS card - It's too hard to show in a photo how amazingly fun this card is. It opens, and opens, an opens again and again, like a game! You can easily use up all of the rest of your paper this month making this really cool never-ending card. I will show you how - it's easy!

Thanks for stopping by - I am off to catch a few winks before my night shift starts again. . . hooray!

Wednesday, December 2, 2009

CDC - Christmas!

At long last - the day was here! And a happy one year anniversiary to the Card Day Club. We started meeting a year ago and wow, what a lot of fun we have had together! It was time once again for Christmas cards and so we met at Stephanie's house today. We made a lot of really fun things - but I have decided to showcase this unbelieveable card by Hanna - so much time and effort went into this one - you simply won't believe it!


Hanna wanted to make a card that looked like a sweater - and she was looking all over for patterned paper that looked like a knit pattern, and was unable to find any. She ended up enlisting the help of her mom, who ACTUALLY KNIT a piece of red . . . sweater. . . and then they photo copied it, and Hanna ran all of the patterned paper through a SEWING MACHINE to stitch the edges of the sleeves and everything! Holy over-achiever Hanna. . . :) It's amazing. We popped the edges of the sleeves up for a little dimension and we finished it off with real buttons and a tag. The inside has the cutest quote that says, "It's cold outside, but thoughts of you warm my heart." Awwwwwww!

Tiffani's holly card seen at the end of the video is also amazing - it features hand made stained glass paper behind a holly cut out - I had the thought of putting a candle behind it and using it as a decoration - it's so pretty and fun!

Everyone brought something amazing to the card-making table today. We came home with several cards, cute tags, and neat ideas for next month too. Are you ready to see the loot? Here you go. I'm sorry I forgot to bring my video camera to Stephanie's house. . . (lol, you should have seen the evil looks I got when I suggested it!) This months' video is dedicated to my sweet little Grandma Bettie who I am missing so much this holiday season. Christmas time was absolutely her favorite. She loved decorations and music - what fun she must be having enjoying them from a better place this year? :)

Wednesday, November 25, 2009

Happy Turkey Day!

A lot of people have a fun holiday tradition of making their own Christmas cards over Thanksgiving weekend . . . wow, how much fun is that? I hope to have some family members some day to share this tradition with some day. (Right now, the boys are not so hot on it.) This week, my friend Kandi asked me to put together a kit for her to make her own Christmas cards. Pshhaw. . . you know me! I was more than happy to get right on it. :) First we looked at a few cards - and Kandi chose to make some ornament - looking cards for her friends and family. Being a newbie to scrapbooking supplies these days must be very intimidating. I can't imagine how it would be to have to stare down the aisles of the craft store - trying to figure out what to buy first? I am hoping that I was able to help Kandi out by picking the best of all of the essentials.

I made use of some patterned paper that I already had on hand. I bought some coordinating cardstock, and a few embelishments. I raided the dollar bins. . . I hit the dollar stamp baskets at Michael's, and used a few other things that I already had on hand. In the end I spent less than $25 for all of Kandi's supplies. All that was left was to cut her some cute sentiments and things with my Cricut. Did I tell you guys that I got a Cuttlebug this month too? I did! And I love it! I am still practicing with it. But I bought a few templates to make a few things for Kandi's kit too.

Somebody said something once - I believe it is in a movie, and it is real similar to a quote by General Patton. Don't show someone how to do a job, give them the supplies that they need to do the job, and let them suprise you with their ingenuity. I love it when a quote totally fits the situation.

Kandi I hope that you have a great time with your kit! Happy Turkey Day to all of you - happy card making and turkey eating and football watching and shopping and all of those great things that come with the weekend. . . . oh, and new video for you too. :)

Monday, November 16, 2009

Shiny Things

My days off are over and I am gently packing away all of my goodies that will be for sale at the craft fair this weekend. I would be telling a big lie if I said I wasn't nervous about this... but I am keeping in mind that it is all for fun and it will be great experience for craft fairs of the future, and who knows what else may lie ahead for me?

I spent today going over my inventory and adding a few things here and there. I made six of these cards at the last minute - to use up a sheet of really pretty ornament stickers that I found.

Here is a list of supplies for this card which used not one, but three different Cricut cartridges. Won't I be glad if I can afford to buy a Gypsy with my craft fair earnings? :)
The card base is a 5.5x7 in. plain white card base.
The bottom layer is a 5.5x7 black cardstock
The red mat is a 5x6.5 red cardstock with an oval window.
I cut the oval window by running the red cardstock through my Cricut using the George and Basic Shapes cartridge - I cut a 5" oval shape. The placement of the cardstock for this cut required a lot of practice with scrap paper, a bit of magic, and quite a few cuss words.
Next I cut a pine branch from the Joys of the Season cartridge on the 3" setting. The pine branch actually includes a pinecone hanging from the branch. I cut those little buggers off. I did not want green pinecones on my branches. Kthx.
The sentiment was cut using Winter Woodland - "Season's Greetings" on the 1.5" setting. I cut the background on black cardstock, the shadow outline on red, and the letters on a gold foil paper. Gluing these three layers together also took a bit of magic and even more cuss words.
Next, I made a pot of coffee and enjoyed some new chocolate mint truffle creamer.
I added glitter to the pine branches. ^_^ *glitter*
I added the ornament stickers and a green bow.
I stamped the insides of the cards with "Merry Christmas" and stamped the
corners of the envelopes with a holly leaf.
It occured to me, that you could make these cards or something similar - and instead of adding the ornament stickers, you could add a real christmas ornament. Something that isn't too huge and bulky - those flat, brass ones could be really pretty this way. Then you could send a card and ornament, all in one. Neat!

That is all for now - I will be working the rest of the week and thankfully, we have Friday night to set up the booth for the fair on Saturday. Wish me luck - I shall return with a lot of photos and hopefully, a lot less inventory. :)


Blog Hop Winner!

...Drumroll please....


And the winner of my blog hop prize for the Operation Write Home post from Saturday is. . .


Jeanna! Hooray! Thank you all for stopping by - I had great time with the blog hop. It's always fun to meet new friends and see what you have all been up to for our troops. It's truly inspiring and amazing. :)


Friday, November 13, 2009

Happy BlogHop!

Oh happy day! It's time for the Veteran's Day Bloghop for Operation Write Home. . . something that I have been really excited about! If you are just getting started or have stopped here by chance, please begin your hopping at the Homefront Blog!

Allrighty then. . . welcome to Scrap Happens. . . my little blog about everything scrappy in my life! I have a few fun card and layout ideas and even videos here. Stop by any time! I love visitors!

So if you are making Valentines for the troops, they are due by January 8th. Plenty of time to get those love notes made! There are so many of our deployed heroes have loved ones at home. I can't wait to send in my next box of cards. . . they are just so full of love! It gives me lots of warm fuzzies to think that their loved ones will recieve these little notes and have a special keepsake from so far away. I don't think that I will ever need any more reason to make cards for the troops than the ones you can find here. Go read. take tissue!!!

One of my favorite things is mixing and matching and finding products that compliment each other well. Here are a few that are perfect for making Valentines! Making Memories has a great selection of papers and embelishments called "Love Notes." (A neat thing about this collection is, it is from last year, so you can find them on CLEARANCE at scrapbook.com!) I also used the "Storybook" Cricut cartridge to cut out some coordinating letters and embelishments. They go together like pb&j. :)


You can also find these coordinating notebook looking pages, which are perfect for liners for the insides of your cards! See?


Does it get any better? Yes! There are also coordinating envelopes and guess what size they are. . . A2. Weeeee!


In no time at all, you can create a whole pile of cards with matching liners and envelopes and adorable sentiments and embelishments. . . it is like Valentine bliss.
Here are a few. . .


Now then, I have to add that I was first introduced to these products because they all came to me as part of a monthly card kit that I got last February from Express the Moment. I use these monthly card kits to make cards for the troops very frequently. I find it fast and easy because all of the supplies are already matched up for you and if you want even more, you can add on extras from the ETM store!

Here is my contest. . . leave me a reply to this post and on Monday evening (the 16th) I will use a randomizer program of some kind to pick a winner - the winner will recieve a Expressions Card Kit that I will purchase for you from ETM. I will also throw in a few goodies and embelishments and other treats. To qualify you must post leaving me a name or contact info of some kind. . . I will post the name of the winner here on Monday night!

I love making cards in general - but especially when they go to the people who will really treasure them - the troops and their loved ones - friends and family at home who are so grateful for all of their hard work.

Now then, there are tons of awesome blogs to move on to. So hop on over to the next blog. . . .

Sewcrazy by Aimee!

and thanks so much for stopping by!

Tuesday, November 10, 2009

November Expressions!!!

Wow. . . this year is flying by faster and faster each month! The November club kits are out from Express the Moment and there is a super cool suprise included with the Expressions Kits! The Expressions kits are for making cards, tags or other lovely things. They cost just $15.oo (plus shipping if you are not local) and boy are they worth every penny! You get all of these great papers and embelishments and envelopes for making . . . . anything that your imagination can create! Kim has asked me to help out by making a few cards for examples each month. She calls this being part of her design team. . . I call it, Ultimate Fun!!!!! Hehehe.

You can purchase the kits at the ETM website. You can even sign up to get them sent to you each month. Can you imagine going to the local craft store to purchase things to make 6-10 cards? I can garuntee you that I can NEVER get out of the craft store only spending $15.00. And even then, I am not so sure that what I bought will match very well. Kim has an incredible eye for detail and such great taste in matching patterns and embelishments and papers. You really have to see these kits to believe it!

Allow me to show an example. If a picture is worth a thousand words, how much is a ten minute video? Oh, all videos for YouTube have to be less than ten minutes. Who knew! :D

I will showcase my Expressions creations here at my blog each month. For even MORE detail and instructions on how to make the cards, you will need to check out the photo gallery at ETM. Thanks for checkin' it out. And here are some fun cards for November. :D


Monday, November 2, 2009

This one's for the boys!

Ahh. . . the next few weeks are going to be just full of scrap! I have a ton of things to finish up to add to my inventory for the craft fair at Bonneville High School - it will be the 21st of November so set your calendars and alarm clocks and phone alarms and all of that jazz. :) I hope to have a lot of really unique an fun things up for sale for the holidays - including all of this last years' inventory that did not sell on ETSY and tons of really fun holiday cards and gifts.

Now then. Who says you can't find or make the perfect hand made card for the guys in our lives? It's not that guys don't like or appreciate hand made cards, I don't think. I'm pretty sure that it's mostly because they could just do without all of the glitter and ribbons and all of that fancy schmancy stuff. So here is one that will be in my inventory for the craft fair. . . just right for all of the Dads and husbands and brothers and grandpas out there, especially if they are the outdoorsy type!

Oh, and there is just one tiny bit of bling. I couldn't help it. (See nose.)


Card Day Clubbers. . . we will be meeting next Monday at Stephanie's house! Hooray for card day. . . who is ready to make Christmas cards?

I will have my November cards up for Express the Moment later this week. I owe a big thank you to Kim for allowing me to help her out with the Expressions Kits each month. . . they will always be featured here at my blog as well as at the ETM site for anyone who wants ideas and tutorials! I am so super excited to be part of Kim's design team! There are going to be a lot of really fun things to do with this in the future. I CAN'T WAIT!

I will also be participating in a blog hop later this month for Operation Write Home, in which we will be featuring Valentines for the troops! This will be a really fun event for Veterans' Day. Lots of great things headed my way, for which I am truly thankful. Times are good!

-Nancy

Monday, October 19, 2009

Card Day!

Card Day is always a little like Christmas :) Everybody gets to go home with so many goodies! It's also an awesome afternoon spent with friends. Good fun, good friends, good munchies. . . hehehe. . . and today we had a new member, Brandi!

Here is a video of the goods from today's creativity. Next Card Day will be November 16th at Stephanie's house. Hooray!

Check out all of these super cute Halloween Treats that we got to take home.

Friday, October 16, 2009

A lot has happened since last I stopped by blogland. I have decided that I need something more mobile for posting with while I am travelling. I recently got to spend some time with my grandfolks in Albuquerque again. I do love getting to see them, even if it is not under the best of circumstances. . .

While in Albuquerque I did pick up some new idea books for card making. One thing that I noticed is the use of a term that is new to me. Paper Engineering. I am terribly excited about this! Paper Engineering. It has such a nice ring to it, don't you think? It sounds so much more important than "scrapping" or "crafting" or "oh, you're working on that stuff again??" Yes, honey, I am a paper engineer now. It sounds so stately! So formal! And so like there should be a big paycheck attached to it. HA!!! Well, we can all dream can't we? :)

Another thing I am terribly excited about is the October Expressions Kit from ETM. Oh, and there is a crop weekend coming up too. . . YAAY! At any rate, I got those cards made from my October kit and I couldn't wait to showcase some of my new learned engineering techniques.
So here you go. If I get requests for such, I will make tutorials. Or perhaps I should call them blueprints? :)

Thursday, September 24, 2009

Fall Inspiration

So I have been having a pretty hard time getting inspired to make fall-ish looking cards and such. I guess it is because things are still pretty green and warm here in the valley and I am NOT READY for fall anyway! But fall is my favorite time of year. The 21st of this month was the Autumn Equinox, which is a holiday of sorts in some cultures. It has been fun to read and learn about some of the pagan celebrations that have leaked over into modern day culture. The symbol of a cornucopia, the celebrating of leaves and trees, and feasts in honor of times of harvest. The realization that we are now headed for longer days and shorter nights - these are all inspirational to me.

I also took a drive to Jackson and visited Grand Teton National Park yesterday, just for fun. This is one of my favorite places and somewhere that I try to go with some frequency. It's like going home - and Wednesday was a beautiful, clear day. Sometimes it is great just to road-trip it and see beautiful things and clean your soul! Who needs more inspiration than this?


I also picked up a 12x12 DCWV stack at JoAnns this week - Indian Summer. The colors are awesome for fall and there are some really neat patters, foiled papers, and glittered papers too. I used my Storybook Cricut cartridge to make the leaves and did a little stitching and glittering too. I ended up with two large cards for the craft booth and four smaller ones for the troops. Click for a zoom to see how I used chalks to edge the patterned papers a little bit. . . I layered them and stitched everything down to the brown card base. The little marquee signs were also cut from the Storybook cartridge. I used some dimentional dots to pop the signs up, and added a green ribbon last. I love how these turned out with so much texture and color. Even though that middle stripe of patterned paper looks like some kind of golfer pants accident!!!


Finally, I was sort of at a loss for what kind of sentiment to use. I wanted something fall-ish and also something that people could use for any fall occasion. I ended up making these in Paint Shop and now I am passing them on to you. The larger sentiment fits perfectly in a 5x7ish card, and the smaller one is for those of us making the A2 size cards for the troops. Both images are .jpg formats and you can save them and print them easily onto blank card stock or paper for your cards or even for scrapbook pages! Be sure to click on them first before saving.

Happy Autumn. . . .


Monday, September 21, 2009

Card Day!

Oh, it had been too long since the ladies got together for card day!!!

The events of today were fantastic. . . it was a great time for the CDC (Card Day Club!) and we did save a few kits for those who couldn't make it this time around. And so I will post pics of todays projects for those who may need a little hand with assembly and such!!! :) We are sure hoping that with fall and the kids going back to school that the CDC will get back in full force in time for making Christmas Cards and such. Our next meeting will be Monday October 19th - hosted by me! More news to follow and of course anybody locally who would like to join us is more than welcome - it's a great time!

Today's Card Day was all about . . . bags and tags!!! WHAT??? No cards??? Well, we decided to do something different and fun, and it WAS! We are definitely going to have to do this one again. We all got to go home with all of these great gift bags. So here are pics of the loot. (click for bigger pics if needed!)

This birthday bag was designed by Tiffani and we had a ton of fun with all of the glitter and the cupcakes. I love the blue and brown colors and the glitter, of course. Yaay! Tiffani also even found the perfect tissue paper for the insides of all of her bags. I think that most of the supplies that we got for all of these bags came from Big Lots and from Wal Mart - Big Lots has especially good deals on plain gift bags in lots of different colors and sizes and you can get them in packages for a very inexpensive price.


This bag is great for a girlie birthday - loving the birthday fairy and all of the bling. This one is also by Tiffani. I think that she went totally nuts with the Paper Doll Cricut cartridge . . .

. . . she also made one for the super men (and boys) in our lives as well because . . . well. . . they just probably wouldn't dig all of the pink glitter on the fairy bag. Then again, you never know.


Too cute this little super man is, with the silver foil city in the background!!!


Deb Egan brought this bag and tag and Tiffani and I are just going nuts over the paper that she chose. She also cut out that little star embelishment thing using glitter paper and we stuck it on the bag with a sugar coated brad. Love the colors for this one and it could be for Christmas OR a winter birthday. . . perfect!


Here is a bag for Halloween goodies. I didn't make a tag to match, I wish I had been that smart. But I DID make a Halloween card because I just couldn't stand it, and we put those together too. Yes- next month will be all Halloween stuff, but I JUST COULDN'T HELP IT. . . HALLOWEEN IS MY FAVORITE HOLIDAY EVER THERE CAN NEVER BE ENOUGH HALLOWEEN!!!


Scary, huh? I know. :)


Finally, here is a bag and tag of sorts, although not a gift bag. This little "bag" is more of a holder for a ziplock baggie. Now you can put cookies or candy or cocoa mix or whatever you want in the baggie, and the baggie goes inside THIS. See? Then the treats show through the little window. All done in my favorite Christmas paper from last year too. . . and that is the end of the Card Day goodies for now. :)


What a great day! Thank you all, it was really a treat!

Wednesday, September 16, 2009

Operation Write Home!

Operation Write Home posted this video tonight. . . and although I have seen this one in the past, it was a very influental reminder of things that are important to me right now.

I can't really do much as an individual to change health care, or prevent global disaster. My car isn't very "green." I don't have much to say about the whole MTV video music awards or time to worry about Brangelina's thirteen kids. . . but I can make a difference in the life of a few strangers, and that is what I would like to do.

To make a point about how very easy it is to get involved with something like Operation Write Home, I am displaying my newest goal. I bought a box of these "My Mind's Eye" blank greeting cards at the Hobby Lobby when I was visiting my grandfolks last spring. They were on clearance. All of the other materials shown here, came from the dollar store, or other various scrapbook sales where things were very, very cheap. I am going to make fifty cards for OWH with supplies and scraps that I already have on hand. I was suprised at how easy it was to whip these ones out. And for pennies! You don't have to spend a lot of money to donate hand made cards. It doesn't take a lot of time or effort. Best of all when I get done and sit back and see what I have done, I just feel really really good. *sigh*

If anyone is interested in joining me in this goal, I am more than glad to share my supplies, space and time, in fact, I spend most of all day Mondays doing laundry and making cards after AJ goes to school. I won't make you help me fold socks. :) But I will share my glue! Email me or leave me a message and you can come join me if you like. I hope to have this box of 50 ready to mail out some time in the next couple of weeks.

Scrap mania over for today. Good night!

Tuesday, September 15, 2009

Wedding Invitations


Filling a request for my buddy Stephanie (It's been way too long, sister!!!) Here is a quick tutorial for Wedding invitations that are fast, easy and fairly inexpensive. They can be mass produced for quick assembly and mailing too!

Cut a piece of cardstock in the size of the announcement that you desire. It should be slightly smaller than the envelopes you want to mail with!

You will also need a piece of patterned paper - Die Cuts With A View makes a great little wedding stack in the 4.5 x 7" size that has a great selection of wedding themed papers in some really cute colors, but there are tons of options out there! You will also need some vellum paper. For this example, I printed the announcement on the vellum in a blue ink to match the blue cardstock paper. I layered the vellum on the patterned paper and rounded all of the corners with a corner punch. You could also use any of those other decorative edge corner punches - there are tons of them out there now! All three pieces of paper are held together by the two eyelets at the top. The final step is to add a coordinating ribbon - you could put a bow on the front if you like. I put my bow on the back. :) I also added a little ring charm. You can get wedding themed charms at any of the craft stores in the scrapbooking section.

There are tons of other great variations of this style - you could also add a silk flower in your wedding colors - or even make this design into the "front" of a card and include an engagement photo - or, you could print engagement photos onto white paper and use the photo in place of the patterned paper as shown here.

Good luck and happy crafting!

Monday, September 14, 2009

More Scrappy Tips!

Ahh, another opportunity for my friends to learn from my accidents!

So I have been totally into the whole digital stamp thing for a few weeks now. I must admit that it took a while to get the hang of it. I learned a few things along the way, so here are a few tips!

Have you collected any digital stamps yet? I will head you in a great direction. Check out Dustin Pike's blog and be sure to stop in at Hambo Stamps too. Once you have a little collection of stamps, here is what you do next.

Decide what size you want your image to be. The cool thing about digital stamps is, you can make them any size you want. Open your image editing software, and make a new project. For instance, I made a 3.5inch by 5 inch window. I selected the whole window and copied the stamp that I wanted. I then copied it into the 3.5 inch window by selecting "paste into selection." (These steps can be modified, according to
however you want to resize your stamp. I realize that all graphic programs are different. I use Paint Shop Pro, so that's how I did mine!)

The next steps I learned through trial and error... mostly error! :)

When you print your stamp, use something heavier than your usual copy paper. This is impoartant especially if you are going to use watercolors to color your stamp. If that is your medium, printing on watercolor paper works best! I printed this stamp on a piece of white cardstock. The cardstock has a little bit of texture to it, which is ok. Next time I might try using one with a smooth surface. Try both!

When chosing your print options, print with the highest quality and dpi available. It takes longer, but the results are worth it. Print several copies on the same piece of paper if you can, this will give you lots to work with!

Coloring the stamp - I tried lots of different mediums. First, I colored with markers. The markers were very bold, but left that . . . marker-colored look, if you know what I mean. Lots of little lines. And shading was difficult. Maybe if you have better markers, it works great. I have cheapo markers. :)

Next I tried using water color pencils, but honestly I need more practice with these. I ended up smudging a lot, and my printer ink ran. . . Not so fun. Next. . . I made a trip to WalMart and bought a shiny new package of Rose Art colored pencils. Awesome! Great for a low-budget project, which is the state that I am in at the moment.

Digi stamp colored, the final step was to cut it out, add a few mats and a little bling. I added some bling with my glitter gel pen. (I need an intervention, have been addicted to the Clear Star glitter gel pen lately. What am I going to do when it runs out?) I added a few glitter brads and finally I mounted the stamp on a card base. Oh! Cute! Did I mention that I love dragons????

Now then, those are the tips that I have for getting started with digital stamps. I'm sure that there are lots of other ways to get the job done but this is what worked for me. . . and here is the result. . . thanks Dustin for your tips! Be sure to stop by his site - he has an awesome deal on five pages of digital stamps that are a great deal. It would give anybody enough to work with for a very long time!

Sunday, September 13, 2009

Peanut Butter! And Jelly!!!!!

Once in a while, when I am putting cards or pages or whatnot together, I run into two products that really really go together well. When this happens, it's like magic! It's like peanut butter! And jelly! Chips and salsa! Fish and chip. . . okay. . . you get the idea! The last time that I had this happen was when the Rock Star pack came out by Die Cuts With a View, and I got my "Indie Art" Cricut cartridge. Those are two things that absolutely go together without fail!

So today Rich, Josh and I made a trip to the craft store. . . wierd. . . I usually have to go to the craft store alone. Not that this bothers me, mind you. :) Josh found some drawing paper. Richard found some halloween gargoyles that are just cute. . . he collects gargoyles so he was really excited, I think, to find something that HE liked in the craft store. Haha.

Anyway. There was a great deal on the new Cricut cartridges and so I picked up "Winter Woodland" which is going to be a great great thing for making holiday cards and such. It wasn't until I got home that I realized just how many awesome things are on this cartridge, and how well they go with the "Polar Expressions" collection by Imaginisce! Imaginisce has been a favorite brand of mine for the last year or so - they always seem to come out with the cutest darned patterns and coordinating stamps and embellies to go along with. Just sitting here looking at this new cartridge and the Polar Expressions stuff has just about put me into a scrap coma. So many possibilities!! I can't wait to get started! So start I did. . . and here is what came out. :)

To make this card I cut two 4.5 inch circles out of both the patterned paper and some white cardstock. I layered them so that the white cardstock is on the inside of the card. I cut the striped circle a little more than in half and used both sides. Those cute hats are on the other side of the striped paper!!! Wee!!! I cut a white strip out of a scrap of the white cardstock and punched the edge to make the scalloped ribbon. Finally I cut the "Let it Snow" sentiment out using a red patterned paper from Imaginisce, and some white and blue cardstock. To finish it all off I used a "Clear Star" gel pen to outline the letters and add a little bling to the ribbon. I used a scrap of silver paper to make the ornament top, cut a hole through it with a circle punch and added the ribbon. Click for a closeup if you like. :) You really have to see the glitter in the Imaginisce paper and the gel pen details to see what a neat sparkle they add. There you go! Super easy, fun and this is just the beginning of my adventures with these products. I'll be back with more soon.


Looking for that cute Polar Expressions paper? Check Scrapbook.com, that's where I ordered mine. :)

Operation Write Home!


An exciting tidbit. . . Cards For Heroes is celebrating their birthday. . . and a name change too! I am super excited to stand behind the new project, Operation Write Home! I invite everyone to check out this site and their mission. It's such a neat thing to be involved in. I am super chuffed to be one of their newest supporters! My box of cards for "Any Hero"es and 25 some-odd blank cards went in the mail last week. It's exciting to think that they will some day make it half way around the world, and back again. I hope that each of these cards will end up in the hands of a stranger and in some way make their lives feel just a little bit better.

And now it is time to get cracking on my scrap space. So much to do. . . Today I am starting to file my inventory for the Craft Fair in November. . . and will also work on finishing up a few odds and ends that I have been putting off. . .

So Happy Birthday Cards For Heroes. . . who is now OPERATION WRITE HOME. . . the deadlines for holiday cards have been posted. . . We have until Sept. 20 to send off Halloween Cards, Thanksgiving Cards are due by October 5, and all Christmas and Hannukkah cards have to be in by November 1! I am going to try like crazy to get one more box done for the holidays. :)

Thursday, September 10, 2009

September Goodness!

September??? How can it be September already? It seems crazy to me. The summer went so fast! The kiddos are back to school... the days are getting shorter... I was just starting to get a little sad about this. And then I got an awesome invitation from Kim at Express the Moment to lend a hand with designing cards for the September Expressions kits! How awesome is that!!! The card kits for this month have some really bold pretty colors with blacks, yellows, blues and pinks. I was grateful for that. Although the chill is in the air, I gotta admit I was not quite ready for autumn colors yet. Let's just call it denial!!!

The great things in this months' kit made it super easy to come up with a few original designs. There are some really cute patterns and embelishments and these wild little chip board buttons that are just adorable! And letter stickers! Oh how cute these letter stickers are!! Here are a few goodies that I made from the kit. . . first, I went kind of crazy with the little owl embelishments in the card. They are way too cute to resist.


The whole owl thing got me on a bird kick. Did you see all of the cute bird things in this pack? Oh my gosh. This card reminds me of one of those uh, social networking sites or something. I'm pretty sure that the resemblence is quite coincidental. :)


Next, an easy layout using lots of mats and a bunch of the coordinating patterns and colors. I love them all so much, it was hard to decide which to use first. And that little chipboard heart is just toooooo danged cute not to showcase.


Another with the adorable papers and colorful embelishments from this months' kit. This card is all about "Just be you!" Which I think is a super cute embelishment for someone fun. I know exactly where this card is going. :)


Another combination of the cute patterned papers available in this months' kits. The kit also has several chipboard WINGS that can be used to make butterflies, angels, or well. . . anything! I love them. I also got a little crazy with the green stickles. . . stickles not included in the kit, but the embelishments in the kit are so cute and glittery. . . it was too hard not to take the glitter and run with it!!! :)


And finally, a favorite. I used almost every single patterned paper in the kit on this one card. It's got tons of layers and isn't it colorful and fun?? I matted all of the papers on black, and wow did that make the colors stand out!!! I love it! Awesome kit, Kim! And thanks for letting me play! I had a great time. Be sure to stop at the ETM site for this months' kit and other coordinating embelishments that match too... I highly reccomend the clear stamp set, it goes with this kit and so much more! There is also a mini album to match... what a fun project for a gift for someone special.

Thursday, September 3, 2009

Video!

I finally made it to Hollywood! Ok not really, but I did make a video.

I have been admiring a lot of those tri-fold or shutter cards that are all over the place.At first I was intimidated by the layouts and the instructions and the patterns. . . well making those cards is a lot easier than it looks! I have been able to crank out a couple of them every day. And now by popular demand, I have made a how-to video for some friends.

Check it out, it's a lot easier than you think and those tri-fold cards come out looking really neat. Happy folding!

Thursday, August 20, 2009

Digital What?

Digital stamps! If I took one thing away from the blog hop over the weekend, it was the awesome new (to me) technique of digital stamping. And boy, do I have big ideas about THIS!

Digital stamps come from all sorts of websites and ETSY stores and blogs. I have found a couple of fantastic ones. Hambo Stamps is a great one - and one of the first that was linked on the blog hop. Dustin Pike also has a great selection of stamps. I am loving his style. :)

So the technique of digital stamping - involves collecting or buying these little digital images or "stamps." They are a lot like clip art or coloring pages. Then you use an image editing program to size them and print them. I am quickly finding out that there are a lot of fun pros and cons of digital stamping. The definite pros are that you can make the stamp any size or direction that you want it to be. You can also add text to your stamp if you want. You can color it digitally, or with pencils, watercolors, or whatever your usual medium may be.

Another great thing about digital stamping is this. I had an "A-HA!" moment while searching for them. It was then that I realized that I already have hundreds. . . or quite possibly thousands of them stored on an old computer of mine. I used to make clip art all the time! This is exciting, because I have a huge collection of Halloween ones, just in time. I am even going to share. :) So stay tuned.

Here is an example of digi stamp adventures from this week. I printed the fish and aquarium background stamps on to white cardstock after sizing them how I wanted. I colored the stamps using some Jelly-Roll glitter gel pens. I cut them out of the card stock with a craft knife. The background is glued directly to the card base. The fish are adhered with some 3-D glue dots, so they stand out nicely. Finally, I used some Paper Glaze to make some "bubbles."


Super fun! If you want to give digital stamping a try - go ahead and download some freebies from Hambo's or Dustin's - or Google digital stamps - there are tons of imagaes available out there. And I should have a few available soon too.

Card day club should be meeting again soon too. Hurrah!!!!

Thursday, August 13, 2009

CFH Bloghop!

Hello! I have decided (last minute of course!) To join a blog hop from Cards For Heroes! So welcome, hoppers to my little blog about Scrap.

Here is a little Christmas Card that is easy to duplicate and sent to friends, family, or Any Hero!

You will need a card base, some white cardstock, some green floss, and some little christmas lights. I found these at Michael's. They are flat on the back, but there are several other varieties that are round... or you could even use little paper lights if you wanted to!


There are a ton of stitching templates out there that have a little curvy line like this. You could also free hand it. When it comes to a string of christmas lights, I suppose the messier the better. :) I stitched with green floss and was sure to add a light every inch or so. You could add as many lights as you want. . . the final step is to glue the stitched cardstock down onto the card base and add a sentiment. I added a "Merry Christmas" stamp, but you could use anything similar.

There you go! So much easier than hanging Christmas lights up on the house, don't you think? And nobody got hurt.

I am kind of new to Cards for Heroes but have had and currently have lots of friends in the service. I think that this is a fun way to show support and lift the spirits of those who really need it!

If you are interested in getting involved with Cards for Heroes be sure to check out their website and remember that NOVEMBER 1 is the deadline for sending in Christmas cards for this season, plenty of time to get those done!

This post is for the CFH BLOGHOP . . . I thank you for visiting and please add me if you like!

Hopping along, your next stop will be Midnight Crafting by Angie. . . sounds like something that would go along great with my night shift job don't you think?!

Thank you so much for stopping by!

August

Having just returned from a trip to Tennessee for my Grandma Bettie's memorial, I was super excited to see that this months' ETM kits were ready for pickup! Creating things is always a great way for me to reflect, relax, and just let my mind go for a little while. What a treat!

While in TN, a wonderful Reverend named Mr. Martin Fischer read from a book called "When God Winks." I got to read a little bit of it after the service and I found it to be quite delightful. It's about how little things happen in your life that may be seen as irony, or chance. It talks about how these little experiences and says that these moments are when God is "winking" at you or sending a little message. Where was I going with that? Oh. . . this months' kit was just the little "wink" I needed!

This months' kit includes a ton of adorable patterened papers and embelishments but my favorite thing of all was the little butterflies. Let me back-track for a moment. Butterflies have always been a favorite thing of mine, but they are specially relevant when someone close to me has gone. There are stories in the family of butterflies at the graveside service for my Aunt. There were butterflies in April at my Dad's funeral. And on the 4th of July as I was looking at the pink roses in the yard, a large monarch butterfly was flying around my garden. Chance? Maybe. . . Butterflies, chance or not, are always a pleasant reminder to me that people change, and move on from this life. Seeing them makes me think happy thoughts that the souls of those who pass before us are not gone, but they are free to float and fly away, visiting us occasionally in our lives and in our hearts. :)

I went with the butterfly theme for all of my cards this month, and best of all there was an adorable gift bag to decorate, so I made a bag and tag too. What fabulous therapy! In the background of these pics I chose to decorate with two special treasures, a vase of pink roses given to me by Grandma Bettie when I graduated high school, and a pink rose china plate that I picked up in Tennessee last week. It is one of her belongings that will always be special to me.

Of other note, the Card Day Club will be getting together again very soon for another great day of creating bags and tags, and I will soon have a really great package to send off to Cards for Heroes . . . I would love to challenge all of my friends and fellow card makers to take part in this great project. The website has tons of ideas and stories about the people who need and recieve these cards!

That's all for now. . .

Monday, July 20, 2009

July - ETM Cards and Such

A good friend of mine was just deployed overseas again, and being also the 4th of July and such this month, I have been reminded frequently of just how many lives our people of service touch - I do have lots of friends with family or loved ones overseas, and this has been going on for years. What have I done to support the troops? Not much, besides the occasional patriotic graphic or banner . . . or joining "causes" on Facebook.

This month's Express the Moment kit came just full of patriotism and ideas for cards that are perfect for our troops. I also found this awesome site. . . Cards for Heroes . . . what a ton of great ideas they have! You can send cards of encouragement and thanks to any random hero or. . . you can send blank home - made cards for the troops to send back home to their loved ones. I am definitely going to support this.

My good friend and his family will be getting a lot of the cards that I made with this months' kit, and I also hope that a few of them get to some random troops that I have never met. . . probably never will meet. . . but perhaps a few encouraging words from a stranger will brighten their day.

According to the Cards for Heroes website, any cards sent should not have glitter on them. I guess that it can get on their uniforms, which is bad for asthetics, but also glitter can be seen with night vision goggles - which can be a huge hazard to our troops! Who knew??? I abstained from using glitter on all of these cards. . . which was a huge deal for me. But all for a good cause, right?

Tuesday, June 23, 2009

. . . and June

AJ and I got to take an awesome trip to Albuquerque to see my grandfolks the first part of June! We had a great time . . . despite a minor breakdown with the Car of Doom which just seems to keep having problem after problem. . .

At any rate, I was able to pickup my Express the Moment kit this week and dive into the new goodies! The best part about making my ETM cards is that it is sort of like exercise. For my brain that is. And we all know I could use a little exercise :) The most fun part of making my cards from the Expressions kits each month is making it up as I go along. The kits always have so many fun things inside. . . and you should have heard me squeal when I saw the new font CD in this month's kit! Yes, a whole CD of fonts that I (*the font queen*) did not have! I am super excited. . . and to celebrate, I decided to use one of the cute new fonts called "Chrissy Lee" to make cards about friendship.

I used these quotes on the insides of the cards - and printed the insides onto cards on my printer. You know what I did today? I refilled the ink cartridges in my printer. ALL BY MYSELF! Rico has this refill kit that comes with syringes and needles and ink, and you have to *carefully* fill all of these little ports on the cartridges. I did it with minimal mess and discoloration of my fingertips! Woot! Sometimes, knowing how to handle a needle and syringe, really comes in handy.

Here are the cards, and the quotes.

How rare and wonderful is that flash of a moment when we discover we have fount a friend. -- William Rotsler (inside of butterfly card)

A friend is someone who knows the song in your heart and can sing it back to you when you have forgotten the words. - Unknown (inside of bird card)

A friend is someone who reaches for your hand but touches your heart. - Kathleen Grove (inside of tree card)

Many people will walk in and out of your life but only true friends will leave footprints in your heart. - Eleanor Roosevelt (inside of round "friend" card)

A friend is someone who knows all about you and loves you just the same. - Elbert Hubbard (inside of stitched ribbon card)

Silences make the real conversations between friends. Not the saying but the never needing to say is what counts. - Maragret Lee Runbeck (inside of the "file folder" card)

. . . and how cute is that tiny file folder? Thanks ETM for the great month. See you at the Expo!