Friday, December 30, 2011

A year of fun!

Over at the Stars and Stamps blog, they are hosting a little end of the year impromptu hop in which we are supposed to show ten of our favorite cards of the year. Fun!! Did I make ten cards this year?!?

I must admit that this year turned out to be much different than I anticipated it would in very many ways... Overall I can say that I have been very blessed to find myself among people who I consider to be true friends. There's nothing like a little rough water to show us who cares enough to show up with the life rafts. :) I love you all, and you know who you are!!!

Although I didn't have near as much time to put into my cards and crafts this year as I would have liked, I did learn a lot, grow a lot, heal a lot, love a lot and work a lot! So here are my ten picks... And my wish to all of you for a very happy, healthy wonderful 2012.


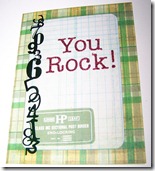
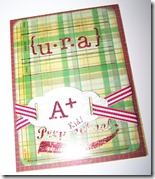
A favorite of 2011 - cards made with dryer sheet backgrounds - they smell so good!
THIS was definitely my favorite new trick of the year!!!


A manly birthday card - I love my Cuttlebug diamond plate embossing folder and some shiny paper!


Always a favoite - Dustin Pike digi stamps. And this year I am trying to learn to use Copic markers.


Pin It


Another favorite this year - kraft paper (I used it for everything!) Close To My Heart Stamps and patriotic themes.


Hats were in style this year, thanks be to the Royal Wedding.


More Close To My Heart goodness and scented dryer sheet backgrounds. Yum!


My favorite Cricut Cartridge of the Year - Create-A-Critter


More manly, kraft paper shiny metal goodness. And a few stolen nails.


I have discovered Stella, from Bugaboo Stamps!


Some of my personal Christmas cards said it all. Stole the basic layout idea from Pinterest. Used an embossing folder for a textured background. Used a decorative edge punch. Used some music paper. Used lots of layers and pretty florals. Used some tiny punches and my iRock tool to set some tiny stones, and just a tiny pinch of glitter.
 
THANK YOU FOR STOPPING BY! HAPPY NEW YEAR!!!

Sunday, November 27, 2011

Christmas Goodies!

I'm so glad that it's time for Christmas goodies! I love to make my own Christmas cards and gifts for friends, neighbors and teachers. Here are a few goodies that my crafty buddy and I made yesterday... and a few little news tidbits too.

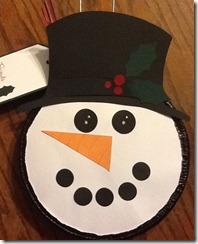
Here is a gift that is fun for neighbors or friends - it's a Jiffy-Pop popcorn tin,decorated! I admit that I have gently scraplifted this from a sweet lady at the craft fair last year and made a slightly different version. . . here are some helpful measurements for making your own.

christmas11_5   christmas11_4

I used my Cricut to cut the following pieces using George and Basic shapes:
  • One 6.5” white circle
  • Two black 1” circles
  • Five black 3/4” circles
I used the Paper Doll Dress Up cartridge to cut a 4” true-to-size hat (from the groom doll).
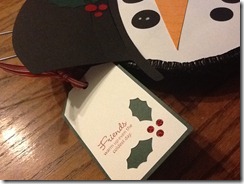
I used the Close To My Heart Art Philosophy cartridge to cut two 2” holly leaves and a 4” holly tag. I cut a 3x2” orange rectangle and cut it in half for the nose.

Put the white circle on the Jiffy Pop by lifting the tin around the edges and placing it over (but not replacing) the instructions. Glue the other parts down leaving the handle at the top. Add a tag and your little gift is ready to hang on your neighbor’s door … what a fun little surprise!

We also made some pretty cards yesterday (again, I am shamelessly scraplifting from a beautiful card that I found on Pinterest). . . It’s fun to find a design that you like and then try to make your own with what tools you have on hand. My snowflakes and embossing and papers are different from the original that I found… but here are some more measurements for you if you want to try this layout. I love it!

christmas11_1
  • The card base is A-2 or a piece of red cardstock measuring 5.5 x 8.5” folded in half.
  • The white paper is 4 x 5” and one edge is punched with a snowflake border.
  • The red embossed mat is 2.75 x 4.75 – we embossed with a beautiful Spellbinders snowflake die.
  • The music paper was cut with a 2” circle and the red ring is a 2” ring cut using the Art Philosophy cartridge, and a 2.5” scalloped circle was cut on white paper.
  • The holly leaves and bird stickers came from a sticker set from JoAnn’s
  • Finally, we used some of the punched snowflakes from the border punch and added them randomly with some gems (We used the iRock tool)
  • Inside is another white paper liner with the snowflake border punch along the right side edge.
I want to try this card using some other colors, as I think that it will look really beautiful in blue, purple and green too. . . and we are in search of some other bird stickers like cardinals and such.

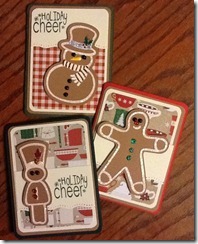
Here is one more project that I have been wanting to do for quite a while. I won a cute Cricut cartridge as blog candy a while ago from Kerri over at Big Smiles From KBear. It’s a darling cartridge called Gingerbread that cuts out lots of cute gingerbread shapes. The hardest part, was finding paper that is Gingerbread colored – I finally found some cardstock by Worldwin Papers called “Spice.”  Perfect! We also used some patterned papers from the new DCWV Christmas Stack and created these little goodies:

christmas11_2


  • The card bases are A-2size with corners rounded.
  • The bottom layer is “Spice” paper measuring 4 x 5.25”
  • The next mat is white cardstock measuring 3.75 x 5”
  • The next mat is patterned paper measuring 3.5 x x4.75”
  • Round all of the corners of your mats.
  • The white strip is 3.75 x 2” with one edge punched with a cute border punch.
  • The cookies were cut using the Gingerbread cartridge at a 4” size.
  • After gluing the white “icing” down to the cookies – we glued random baubles (red and black scrap crystals) and used lots of stickles to decorate the cookies… you have to zoom in on  the pic to see just how sparkly and cute they turned out! I love them! I used the *Holiday Cheer* stamp as a sentiment on two of mine – I’m pretty sure that is a Daisy Bucket stamp, but I don’t remember for sure. Sorry. :(
Now then, I did mention Pinterest earlier, and I have to admit that I finally jumped on the Pinning bandwagon and I love it – I’m still a newbie though, so I haven’t figured all of it out quite yet. When I do, I am going to try to figure out how to add pins to my posts so that you can share if you like. I’ll be giving this a try later, to see if I can get a pin to work for this post.

Thanks for stopping by, and thanks for returning to my blog this year. I know that things have been a little slow this year and I haven’t had time this year to do near as many tutorials, videos or posts. . . I’m working on a few plans for 2012 to improve this, so thank you again and see you soon!
-Nancy

Thursday, October 27, 2011

October Expressions


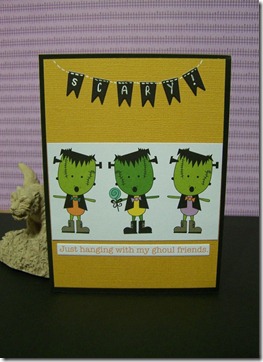
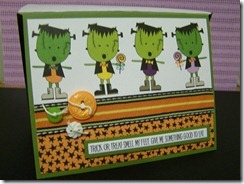
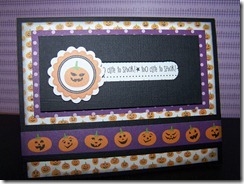
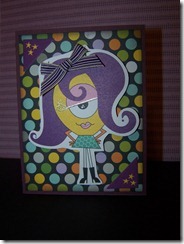
Here are some goodies made with the October Expressions – Card-making kit from Express the Moment! I can’t resist these cute papers and embellishments by Bella Blvd! Too Cute To Spook is the name of the line and that is just way too appropriate. :) Can you tell that I love these little Frankensteins the best?

ETM_Oct1.11


Kim picked out the perfect assortment of ribbons, punches, buttons and embellishments and some rub-ons by FancyPants to compliment these cute papers. There is a whole sheet of black chipboard pieces and a full sheet of letter stickers and decorations too.

ETM_Oct2.11    ETM_Oct3.11ETM_Oct4.11    ETM_Oct7.11ETM_Oct5.11    ETM_Oct6.11

Here’s a link to a little tutorial on the spinner card by TikiBoo. . . there are a lot of different spinner card tutorials, but hers is a great one. All of the little papers and embellies in this month’s kit just screamed, “SPINNER CARD!” to me,  so there you have it.

Don’t forget to stop by Express the Moment for your kits. . . and check out the ETM blog for more fun kit ideas too. Thanks for stopping by!

Sunday, October 23, 2011

Bundle Up!

Ok card makers... we only have until October 31 to finish Christmas Cards for the troops! Time has been flying by around here and I feel like I barely had time to get any Halloween goodies made. I did make a few (I'll share 'em later!)  but today I slipped in a little goodie for OWH.

I recently got all of my new holiday goodies in the mail from Close To My Heart. (Still Enabling. . . no website. . . call me, if you need a fix.) I bought the Wonderland paper packs and a cute little stamp set called Bundled Buddies. I have decided that these are what I am going to make my personal cards with this year. . . so I wanted to give them a little test run. Here is my card for sketch #92 . . .


I think that I love the non-traditional blues and browns of the Wonderland papers, as well as the woodland critters (and we do live in Fox Hollow!) . . . I stamped with Chocolate brown, distressed with Twilight and Crystal Blue and colored with Copics. This is going to be such a fun year for cards! I love them. 


post signature

Saturday, October 1, 2011

Bloghop!


Thank you for stopping by - today I am participating in a bloghop for world card-making day. Doesn't that sound like the best day ever? You can click the banner above to visit tons of great blogs with holiday cards for this event. Thanks, Opration Write Home - for another fun blog event!

Here is my holiday card for the hop - I used some of my favorite holiday papers, stamps and embellies. You know, the kind that you have to FORCE yourself to use because you don't want to use them all up because they are too pretty??? This candy stripe paper is my most favorite thing ever. :)


I saw a similar layout in a recent card magazine* and decided to try an A2 sized version of it. If you want to make this card, here are the measurements:

Card base (white) 8.5 x 5.5" folded in half.
Green mat: 4 x 5.25"
Candy stripe mat: 3.75 x 5"
Two green rectangle mats: 2.5 x 2.25"
Two patterned paper mats: 2.25 x 2"
One green mat for sentiment: 3.75 x 2"
One patterned paper mat for sentiment: 3.5 x 1.75"
One white mat for sentiment: 3.25 x 1.5"

I also used a 10" piece of ribbon, a stamped sentiment (Peace On Earth set), my favorite Mistletoe papers, a mistletoe sticker, white and green markers for faux stitching and some New England Ivy and Cranberry inks, all by Close To My Heart.

Thank you for stopping by!

post signature


* Paper Creations - Fall 2011 - page 62 - there is an adorable Halloween card on page 62 by Mz. Jenny Gropp. I do love those layers!

Sunday, September 11, 2011

Virtual Card Making Party


I was able to spend most of today reflecting on the events of September 11, 2001. My son was just a baby then, and he doesn’t remember that day. I had just worked a night shift and was on my way home from the hospital. The radio station in my car, which usually had the “morning show” and lively music, was full of news. . . every station was, and I could barely comprehend what I was hearing. I raced to get home and turn on the TV and I caught the live coverage, just as the first of the twin towers collapsed. I spent the rest of the day watching the news and didn’t sleep a wink, even though I had been up all night the night before. What I remember most, was talking to my Grandmother in Tennessee, who was crying and upset. She herself had lived through Pearl Harbor and she was just certain that the days’ events would bring about the beginning of World War 3.

I couldn’t think of a much better way to spend today than by doing something to say thank you to the families of the heroes who have served and protected our country. Especially those who are deployed now – and so you guessed it, I dusted off my very dusty supplies and spent some time participating in todays’ Virtual Card Making Party.

You can find a list of the blogs participating at the Stars & Stamps Blog but I will link all of the ones that I participaed in here. On a Virtual Card Making Party hop, you visit each blog and make a card like the one on the blog. The rules are simple and really fun. . . this is the second VCMP I have been able to participate in this year and I hope that there are more!

I’m a bit behind the curve and I probably won’t get all of my cards done in time for the deadlines, but I figure, better late than never and I am really just hopping along for the fun of it anyway. Here are my cards. . . (Sorry, no fancy photos, I didn’t have time to do much but take some quick snapshots and besides, my camera is being terribly naughty!)

Card one for the challenge at It Was Here A Minute Ago. . . (cute name right?) Is to make a card with an animal on it – I used the digi stamp of Steve the ferret that Sandy made for me last year. I still love this digi to pieces! Thanks Sandy!

VCMP1


Card Two is for a challenge at Stamping With A Mission – make a card about nature. I was inspired to make a fallish one and used some paper from my new DCWV stack and a stamp set from JoAnn’s. I’m loving the autumn colors!

VCMP2

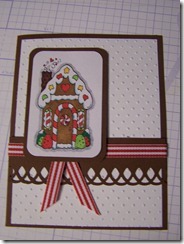
Card Three is for a challenge at Paper Therapy Ponderings – try to make a Christmas Card without the traditional Christmas Colors. I think I did okay with the white and brown but I couldn’t help but sneak in the red and white ribbon. I can’t for the life of me remember where the gingerbread house digi stamp came from. :(

VCMP3

Card Four (also known as card five. . . lol) was made for the challenges at Handmade By Julie. We were asked to pick a number and then follow the sketch that goes with it. I picked #37 and made this card . . . and then moving on to the fifth stop, I realized that the object at Scrapping With Purpose  was to make a card about “Falling for You.” While I realize that this is probably cheating, I am gonna go ahead and roll with it. :) I’m already behind!! I hope I can be forgiven. :)

VCMP4&5

Stop #6 – Visions of Paper asked for a manly paper pieced card. So I stamped this car on white and on yellow paper and pieced it to make this NASCARCARD. The flags were also stamped on yellow, then white and pieced. I love this cuttlebug folder with the diamond plate to go with the manly car cards.

VCMP6

Going to break for now and come back for more after dinner if I have time – otherwise I will see how many more I can get done this week. Thanks for stopping by!

Saturday, September 10, 2011

September Expressions


What a wild end to the summer – I just realized that I have NO posts since my last kit from Express the Moment. Sorry!!! We have been so busy squeezing in some last camping trips and fun things before the summer is over. We’ve had some beautiful weather and some really fun times!

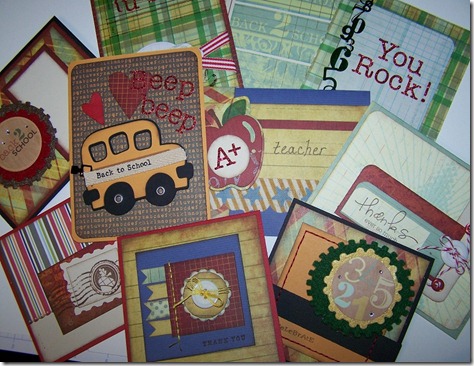
Just in case I need another reminder that school is now upon us. . . I got to work with this month’s Expressions card kit from ETM. I just don’t know where Kim finds these great products. . . this month’s kit is packed with some great papers and embellishments from Pink Paislee’s Old School collection. What a fun chance to make some neat back to school projects like thank you cards for teachers, and good luck cards for kids! 

ETM_Sept11.11

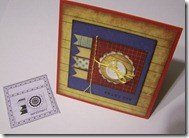
This month ETM is joining forces with “Page Maps” – there is a whole page of their card map samples in the kit. I cut out a few, and placed them next to the cards that I made from the “maps” so you could see. Card Maps from the Page Maps site have always been one of my favorites. If you visit their site, you can find tons of card and page layout ideas that you can download and print for free. I keep mine in a binder. . . what a great resource!


ETM_Sept2.11ETM_Sept3.11ETM_Sept6.11

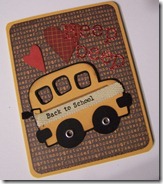
A few more cards: I did use my Cricut to cut this apple and bus (Doodlecharms) because I just couldn’t help it. Back to school is so fun. Don’t you think?  You can click on any of these photos to see them larger if you like.

ETM_Sept4.11   ETM_Sept1.11

More cards. . . I do love the letter stickers in this kit, and there are several buttons and some red and white bakers’ twine. There are some adorable circular shaped felt embellishments and some really great clear acrylic layovers that are very fun to work with. All of these things are in the kit for just $15 . . . don’t forget to swing by the Express the Moment Blog too for more fun examples of things that you can make from other ETM kits.

ETM_Sept5.11ETM_Sept7.11

ETM_Sept9.11ETM_Sept8.11ETM_Sept10.11

Hey, before you go, take a look at this handsome 6th grade fella. I can’t believe that this is the last year of grade school, where did THAT time go? I suppose that I had better get to work on his grade school scrap book, maybe I will be able to share some of that later this month. Thanks for stopping by!

014

Sunday, August 7, 2011

August Expressions!


Awesome, another month closer to school. :)  Not that I haven’t enjoyed this summer, because it has had some pretty amazing moments. But I do love fall and back-to-school time the best of all of the seasons. But quick, before the summer is over, here are a few fun summery projects and cards from the Express the Moment August Expressions (card making) kit!!!
ETM_Aug4.11

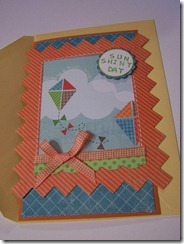
Here is a card with a cute frame and kite background. . . some of these adorable bright colored summery papers are by My Mind’s Eye and they are from the Citrus Lime collection. I do love MME.  :) I was thinking that some fun summery quotes would be fun for these bright cheery cards. One thing that makes me think of summer is summertime music. You know how you can hear a song and just automatically think of summer? There are tons of them out there. I used “Bright, bright sun-shiny day” as a sentiment for this card. What summery song titles can you think of to use as sentiments?


ETM_Aug1.11

I can’t get by without using this week’s card sketch from Stars & Stamps with this kit. This is amazing. . . the twine, buttons, letter stickers and everything I needed to make this week’s card sketch were included in this month’s kit. Cool huh?

ETM_Aug2.11

This card was made on a small round scalloped edge card base. The card base wasn’t in this month’s kit. But I have about a zillion of them around here and wanted to use some. :) I cut two 4” circles to make the inside and front of this card. I added a 1” strip of orange patterned paper and a flower and button, and stamped the sentiment directly onto the dotted background paper. This one is one of my favorites. :) If you don’t have a round or scalloped card base or the means to cut one, it would be easy enough to make one by just adhering your circles with a scrap of paper or cutting them so that the edges touch, just fold along this part. You could even trace around a can, bowl, or other round object to make your own card base.
ETM_Aug3.11ETM_Aug3b.11

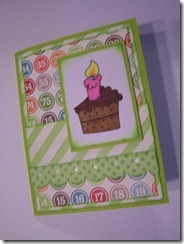
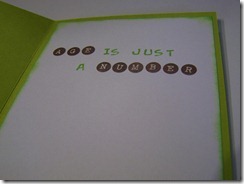
Just look at this patterned paper with the little bingo numbers on it. So cute! I made this card with several layers of the bright patterned papers and then I added a Dustin Pike digi stamp and a sentiment inside. “Age is just a NUMBER.” Isn’t that so true?
ETM_Aug5.11

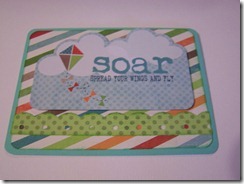
This one was fast and easy – I added a small mat of striped paper to an A2 size card base and rounded the corners. I added a small border strip and a title that came along with the kit. “Soar – spread your wings and fly.” What a fun card to give to a kiddo headed off to college right? Of note, this paper totally reminds me of Fruit Stripe Gum. Remember Fruit Stripe Gum?
ETM_Augtpalbum1.11

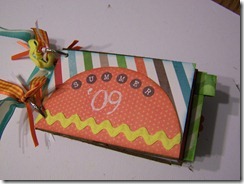
Did you take a ton of fun family photos with your sisters brothers aunts uncles cousins kids and other family members? Wouldn’t it be neat to send them a tiny memento of your summer fun? And it’s made out of toilet paper rolls!!! I saw somebody make an album similar to this somewhere on the internets. I don’t know who, or possibly, it was a couple of sources. I do not know who owns the rights to thinking up the Toilet Paper Roll Album. At any rate, they were brilliant. This is one version of the Toilet Paper Roll album that is fast and easy. Let me show you how I did it.

ETM_Augtpalbum2.11

First you will need to save up or go dumpster diving for some empty toilet paper rolls. :) Check the kids’ bathroom trash. They usually have several! I bought really cheap TP last time, so these were fast and easy to come by! You can use as many rolls as you like. My little album used five rolls. First, smash them flat. Use a bone folder or other tool to crease the edges firmly. Then, put your rolls under something heavy for a while. Like a stack of books. A ginormous pile of scrapbooking paper. (I KNOW YOU HAVE ONE!!!) Or your Cuttlebug! Those things are heavy. At any rate, smash them. So that they are super flat. You can work on the rest of the album while your rolls are flattening.

ETM_Augtpalbum3.11

While you are waiting, Cut enough pieces of paper to cover both sides of your rolls. My rolls measured exactly 2.5 x 4”  but you should probably measure yours first, just to be sure. I’m pretty sure that most toilet paper rolls are the same size. But maybe not!!! I also distressed the edges of each piece of paper and cut and punched a few other embellishments.

 ETM_Augtpalbum4.11

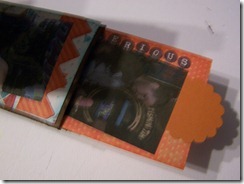
I also cut three pieces of paper that measure 2.5 x about 3.75” – just slightly shorter than the other pieces  (above) and added a variety of tabs to them. These pages slip INSIDE of some of the rolls and you can pull them out for a cute surprise. :)

ETM_Augtpalbum5.11

By the time I was done with the previous steps, my rolls were pretty flat. I distressed the edges on both sides with some dark brown ink. You don’t have to do this, or you could distress with a different color, or even paint with white acrylic paint. Whatever you like. :)

ETM_Augtpalbum6.11

The rest of the job is to adhere the papers to both sides of the rolls in a book fashion. . . think chipboard album, only tiny. :) I added a few scraps, punches and stickers to each page along with photos of the day that my brother, Alex and I spent at the pool with my niece and nephew. Of note, if your printer prints certain sizes of photos onto a large page, like a page of wallet sized photos, this works perfectly for this size album!
ETM_Augtpalbum7.11

Here is one of those tab pages. You could also slip little things into these spaces like mementos, ticket stubs, programs or whatever you like! The last step is to use a hole punch or drill to punch through each roll. DO NOT put your tab pages inside the rolls, until this step is over. You don’t want to punch through the tab pages. Also, if you have a good punch, like a Crop-A-Dile or an industrial strength drill press this works much better for punching through all of those layers rather than a little hand-held traditional hole punch. Your hand will thank me. I joined the pages with a couple of spare rings and added a bunch of ribbon scraps to the rings. CUUUUTE!!!

ETM_Augtpalbum1.11

This tiny album really didn’t take long to make. I meant to time it – so I could say exactly how long it took, start to finish, but I wasn’t watching the clock closely enough today. I do know that I started building this little album when hubby started watching the NASCAR race today and when I finished, there were still 243 laps to go. So about 6 hours. Just kidding. :) It really only took an hour or so. And it was fun!

That’s all for today, thanks for stopping by! (And for hanging in there, this is a huge post!)